Selfhosting FreshRSS with docker-compose
Guide copied over from here with fixes for a few things How to Self-Host a RSS Reader with FreshRSS
Why FreshRSS?
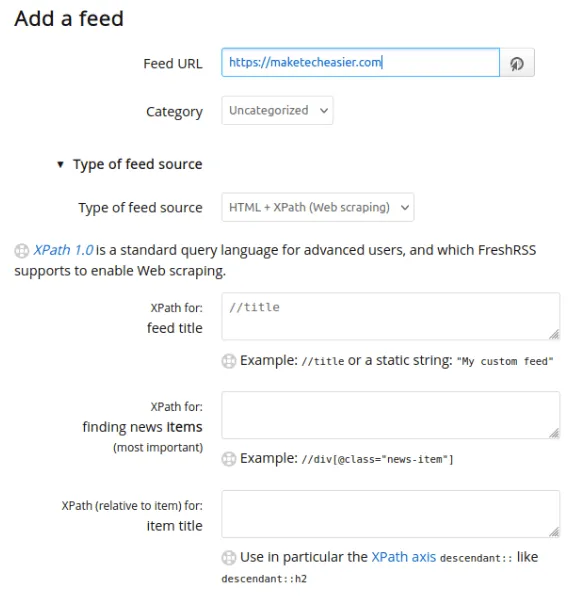
One of the biggest selling points of FreshRSS is that it comes with a built-in web scraper. This means that you can create basic RSS feeds even on websites that do not support it.
FreshRSS also supports push notifications on modern content platforms. As a result, the platform can be incredibly quick and reactive to post updates. Lastly, it is also simple to install which makes it an ideal project for novice users that are just getting started with self-hosting.
Installing FreshRSS
Assumption: This article assumes that you have a working domain name with an A and PTR record pointing to your VPS instance’s IP address and hostname.
We will be using Docker to install FreshRSS.
Install Docker
Fetch the Docker repository’s signing key from the project’s website:
curl -fsSL https://download.docker.com/linux/ubuntu/gpg | sudo gpg --dearmor -o /etc/apt/keyrings/docker.gpg
sudo chmod a+r /etc/apt/keyrings/docker.gpg
Create a new repository file for Docker:
Write the following line of code inside your new repository file:
deb [arch=amd64 signed-by=/etc/apt/keyrings/docker.gpg] https://download.docker.com/linux/ubuntu jammy stable
Refresh your system repositories, update your system, and install the Docker binaries:
sudo apt update && sudo apt upgrade
sudo apt install docker-ce docker-ce-cli containerd.io docker-compose-plugin docker-buildx-plugin nginx
Building the FreshRSS Docker Container
Make a new directory in your user’s home directory for FreshRSS and go inside it:
Create a “docker-compose.yml” file using your favorite text editor:
Paste the following block of code inside your new docker-compose file:
version: "2.4"
volumes:
  data: null
  extensions: null
services:
  freshrss:
    image: freshrss/freshrss:latest
    build:
      context: https://github.com/FreshRSS/FreshRSS.git#latest
      dockerfile: Docker/Dockerfile-Alpine
    container_name: freshrss
    hostname: freshrss
    restart: unless-stopped
    logging:
      options:
        max-size: 10m
    volumes:
      - ./data:/var/www/FreshRSS/data
      - ./extensions:/var/www/FreshRSS/extensions
    ports:
      - "8080:80"   # YOU CAN CHANGE THE PORT TO 8081:80 if 8080:80 is taken, only change the port on the left side
    environment:
      TZ: Europe/Sofia # CHANGE TO YOUR TIMEZONE
      CRON_MIN: 3,33
Save your docker-compose.yml file. Run the following command the build your docker container:
Setting Up Reverse Proxy and SSL
Once the FreshRSS instance is up and running, next we will configure Nginx to a reverse proxy so you can access it publicly via your domain name.
To start, create an Nginx site configuration file for your instance:
Paste the following block of code inside your new site configuration file:
server {
    listen 80;
    listen [::]:80;

    root                    /var/www/html;
    server_name             freshrss.your-domain-name.here;

    location / {
        proxy_set_header    X-Forwarded-For $remote_addr;
        proxy_set_header    Host $http_host;
        proxy_set_header    X-Forwarded-Proto $scheme;
        proxy_pass          http://localhost:8080;
    }
}
Save your new site configuration file and run the following command to create a symbolic link to “/etc/nginx/sites-enabled”:
If everything is fine, reload your Nginx server daemon and enabling it on system startup:
Enabling SSL For Your Instance
To obtain an SSL certificate, install the core snap daemon to your system:
Accessing and Configuring FreshRSS
Open a web browser and navigate to the address of your new FreshRSS instance. Click the dropdown list on the page and select the language that you want FreshRSS to run on, then click “Submit.”

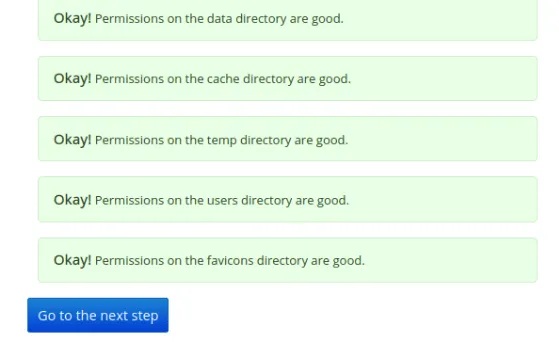
Doing that will load FreshRSS’ self-test module which will check whether the current instance is running properly. To continue, scroll down to the bottom of the page, then click “Go to the next step.”
Click the dropdown list, select “SQLite” then click “Submit.”

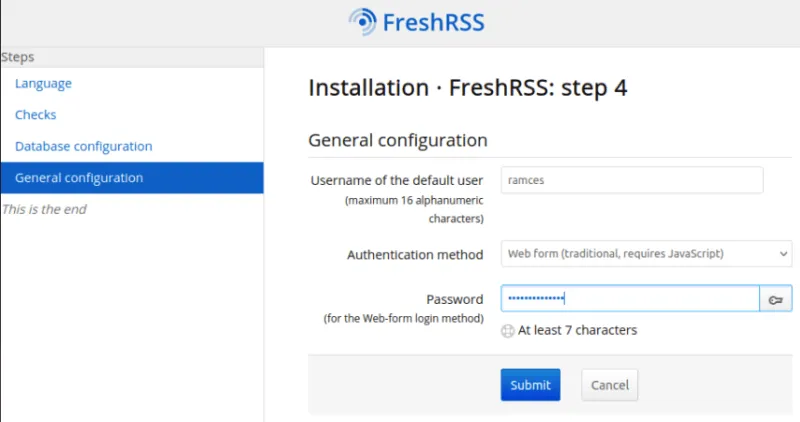
Fill in the details of your instance’s administrator user, then click “Submit” to create it.
Click “Complete installation” to properly start your new FreshRSS instance.
Installing extensions
Press the cog wheel in the top right > Extensions.
ONLY ADMINS CAN ADD/REMOVE EXTENSIONS
I'll demonstrate how to download ThreePanesView, the process is the same for all other extensions.
Press on the anchor tag for ThreePanesView or your desired extensions - it should lead you to a repository. In my case https://framagit.org/nicofrand/xextension-threepanesview.
Click on the download icon and copy the link for the zip file - https://framagit.org/nicofrand/xextension-threepanesview/-/archive/master/xextension-threepanesview-master.zip.
In the folder:
wget https://framagit.org/nicofrand/xextension-threepanesview/-/archive/master/xextension-threepanesview-master.zip
Then unzip the file:
Use ls to check what's inside the folder, if it's a subfolder you'll have to move it with mv to ~/freshrss/extensions. Extensions will usually have the following files: metadata.json, extension.php etc.
If you want an extension to be enabled or disabled by default for all users (without their ability to enable or disable said extensions), use your favorite text editor and edit the following line in metadata.json:
The other value is "user", which will allow users to change it at will.
Changing the theme
Press the cog wheel in the top right > Display.
Cycle through the themes and when you've picked your favorite, press Submit at the bottom. This is a User side change and won't affect other users.
Enabling User Registration
I WOULD NOT RECOMMEND DOING THIS WITH AN SQLITE DATABASE, USE POSTGRESQL INSTEAD
To start, login to your FreshRSS administrator account, then click the cog icon on the page’s upper right corner.
![]()
Scroll to the “Administration” category, then select “System configuration.”
Go to the “User registration form” subcategory, click the dropdown box beside the “Registration form”, then select the “Enabled: No limit of accounts.” option.

Save your new site configuration by clicking the “Submit” button on the bottom of the page.
Wiping an Existing User’s Data
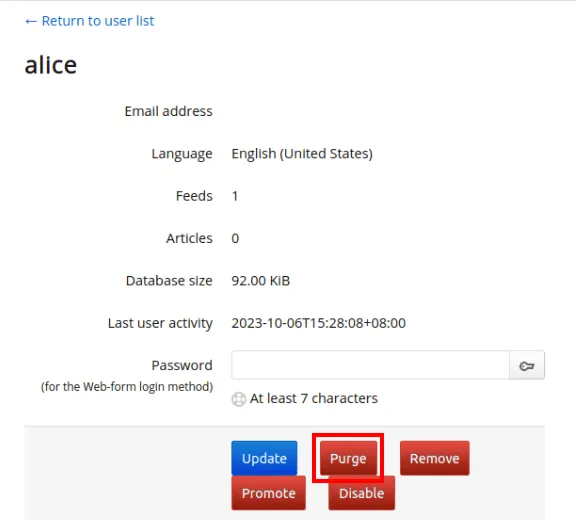
Go to your FreshRSS administrator account, then click the cog icon on the page’s upper right corner.
Go to the “Administration” category, then select “Manage users.”

This will bring up a page with a list of the current users in your FreshRSS instance. Click the name of the user that you want to disable.
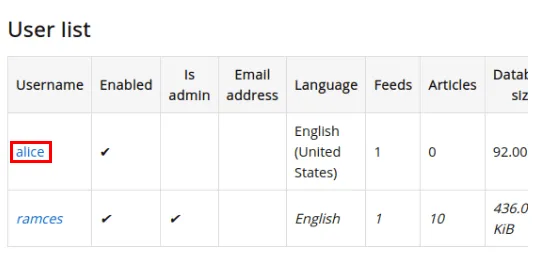
Click the “Purge” button to wipe the user’s RSS feeds clean.